By Lee Hutchinson, Ars Technica – October 31, 2012 at 09:45PM
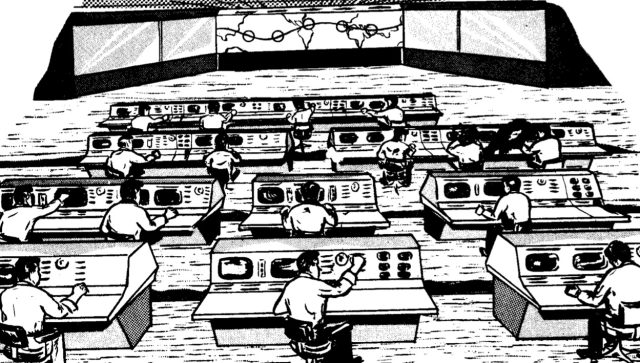
Ars recently had the opportunity to spend some quality time touring the restored Apollo “Mission Control” room at the Johnson Space Center in Houston, Texas. We talked with Sy Liebergot, a retired NASA flight controller who took part in some of the most famous manned space flight missions of all time, including Apollo 11 and Apollo 13. The feature article “Going boldly: Behind the scenes at NASA’s hallowed Mission Control Center” goes in depth on what “Mission Control” did during Apollo and how it all worked, but there just wasn’t room to fit in detailed descriptions and diagrams of all of the different flight controller consoles—I’m no John Siracusa, after all!
But Ars readers love space, and there was so much extra information that I couldn’t sit on it. So this is a station-by-station tour of Historical Mission Operations Control Room 2, or “MOCR 2.” As mentioned in the feature, MOCR 2 was used for almost every Gemini and Apollo flight, and in the late 1990s was restored to its Apollo-era appearance. You can visit it if you’re in Houston, but you won’t get any closer than the glassed-in visitor gallery in the back, and that’s just not close enough. Strap yourselves in and prepare for an up-close look at the MOCR consoles, Ars style.
The layout
For most of Project Apollo, MOCR 2 had a fixed layout. Each station handled a specific, related group of functions; some watched over the spacecraft’s hardware, or its software, or its position in space, or over the crew itself. Here’s how things were laid out for most of Project Apollo:
Read 42 remaining paragraphs | Comments